Please excuse the broken picture links on the blog. I'm in the process of moving all of my pictures from photobucket to smugmug and it's taking a lot of time. thanks for your patience!

Tuesday, August 23, 2011

pin-up girl

My dad is currently in the hospital and his birthday is this Saturday. I made this card and am hoping it cheers him up.


digital image: ginger beer from blue butterfly stamps
markers: copic
cardstock: stampin' up (blue and red) and paper trey ink (white)
patterned paper: stampin' up
border punch: ek success
greeting punch: stampin' up
greeting: close to my heart
brown ink: stampin' up
round clip: unknown
glitter: stickles
sewing machine

Saturday, August 6, 2011

Quick and easy headband tutorial


This is the easiest headband ever, both to make and to use. No ties to worry about and they are comfy. I needed to make one for my daughter to use for dance so I thought I'd take pictures of the process and share how I did it. There are tutorials all over the web for making these so they might differ from what I do. I made this for my 14 year old daughter who has pretty much an adult size head and she doesn't like tight headbands. You can adjust the length of the elastic for smaller heads or for a snugger fit. The diameter of it is 21" unstretched. Measure your head or your child's head and adjust accordingly.

You will need some fabric (you can make 2 headbands from a fat quarter) and some 3/4" wide elastic (no more than 8.5" is needed).

All seam allowances are 1/4".

First cut 2 pieces of fabric:
One will be 6" wide by 14.5" long - the headband part
The other will be 2.5" wide by 11.5" long - the stretchy part


Fold each piece with right sides together so the long ends match up and sew along the long edge. You'll end up with this:


Next you'll need to turn both of them right side out. The big one is easy-you can do that with just your hands. The small one is a little trickier. One way is to put a safety pin on one end like so:

and then push the safety pin through the tube, pulling it right side out.

I'm lazier so I prefer to use this method-a hemostat. I bought this at flea market for a dollar and it's worth 10 times that much. Maybe 20.


Just push the hemostat skinny end through the tube, catch the end of the tube in the pinchers like so:


And carefully pull it through to turn it right side out:


Use your fingers to adjust the tubes so the seam is in the center of one side like this, and press flat with an iron. I press the seam to one side. I can't even imagine trying to press it open, especially on the skinny tube.


Cut a piece of 3/4" elastic. I use a measurement of 7" finished so I add 1/2" for both seam allowances plus an extra inch for holding onto. So I cut it 8.5". Then I mark the elastic 1/2" away from each end (the reason is clear in the next step). Put a safety pin in one end to thread it through the tube.


Thread it through the skinny tube. When you get to the point where the marked line on the opposite end from the safety pin is lined up with the end where you started threading, stop and pin it. Make sure the line matches up with the raw edge like this and put a pin in to hold it:


Finish threading the elastic through. Pull it so that the other line matches up with the other raw edge like so, and pin it:


Sew along each end, just inside the raw edge. I sew about 1/8" in. You don't have to be exact here-mainly we're just sewing to secure it for now.


Take this piece and put it in the center of the bigger tube, with right (non seamed) sides together like this:


Then you'll fold the edges over. Here is the first one-folded over and pinned. Normally I don't pin until both edges are folded over but I wanted to make sure it was easy to understand:


And the 2nd edge. This will enclose the stretchy part inside the headband part:


Stitch across the end with a 1/4" seam allowance. This is THICK. You're sewing through elastic plus eight layers of fabric. I use a longer seam length. I also use a bigger needle (I use a 14 but a 16 would be good too) and stitch across like so:


I sew over it three times. Once forward, once in reverse, and again forward. It looks like this after it's sewn.


Do the same on the other end. It's a little trickier because you have more headband length than you do stretchy length but it's not hard. Remember to sew over the seam a few times.


At this point you can trim off that extra elastic that's hanging out. Turn the ends right side out (just pull the stretchy and headband parts in opposite directions) and you're done!


And flattened out:


Friday, June 10, 2011

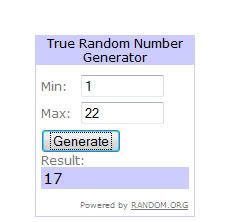
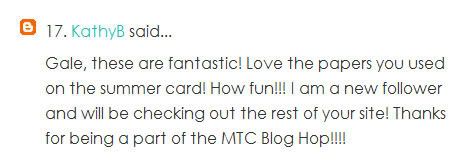
Drawing winner!

I am so sorry-I forgot to do this drawing on the 7th. So it's a few days late-oops! So anyway, without further delay, the winner is...


KathyB!! Congratulations Kathy! I will contact you to be sure which email you want your gc sent to. thanks to everyone for visiting and commenting!

Sunday, May 22, 2011

MTC Blog Hop-MY TURN!

It's finally my turn for the Make-the-Cut Blog Hop. If you've gotten lost, just click the blog hop button on the right to find the main page with the list of all the participating blogs. Also be sure to read to the end of this post for the blog candy info! As many know, MTC does not work with the cricut anymore. But fear not! It works with plenty of other cutters, including the Black Cat Cougar, Black Cat Lynx, Bosskut Gazelle, Silhouette, Craft Robo, US cutter MH/Laser point series, ECraft, Pazzle, KNK, and any cutter using an HPGL printing support feature.

So on to my projects. I have the Silhouette SD and although it's not yet a native plotter in Make-the-Cut, it is possible to cut with it through the print menu. It works perfectly and I wanted to focus on using both a graphic and an svg file.

My first project is this summer card. I made it for my daughter to give her speech therapist since she only goes to speech therapy during the regular public school year. So it'll be a nice 'Have a Great Summer' type card. I used the pixel trace function in MTC to trace some images from the Sunshine Fun graphic set. I had to trace some of the images more than once, but usually only twice, to get all of the shapes I needed. (For tutorials see the end of this post-I will post links to them.) Patterned papers are from KI Memories and Stampin' Up. Cardstock from Bazzill and Stampin' Up.


For my next project I wanted to use an svg set. So I imported some shapes from the Doug's Outer Space svg set and cut them out for this cute boyish spaceman card. Using svg files in MTC is so easy and I love that Lettering Delights has so many to choose from. Cardstock is all from Bazzill, Neenah and Stampin' Up. I also wanted to mention that despite popular belief, the Silhouette SD does cut heavier cardstock without any problems whatsoever. I used Stampin' Up, Bazzill and Neenah paper on both of my projects and did not do any multi-cuts. All of the cuts came out perfect and clean, even in the corners and on the smallest shapes. Both cards here are 4.25 x 5.5 so you can just imagine how tiny some of these cutouts are!


And now for the blog candy. I'm offering a $10 gift certificate to Lettering Delights!! To enter, just leave a comment-that's it! If you want to follow my blog I'd be grateful but it's not necessary to be eligible for the gc. I will draw a name a week after the hop ends. And be sure to check the main hop page every day to see whose blog to visit next!!

Here are the tutorials I promised:
How to use pixel trace in mtc
How to import svg files in mtc

Thursday, April 28, 2011

Toy Box card

Since I've been neglecting my stamps, I decided to just open one of my stamp drawers, grab out a set, and make a card with it. Here's what I came up with.

stamps: Toy Box from Stampin' Up
cardstock: Stampin' Up
patterned paper: Die Cuts with a View (I think it's the recycle stack or something)
markers: Copic (used to color them and also I used it to [crudely] add color outlines to the rectangles).
buttons: I *think* they're from Oriental Trading and I used thin cuts of paper to make the 'thread'.

Monday, April 25, 2011

Easter Egg Boxes

I used my Silhouette and a neat Silhouette cut file to make these egg boxes. I added a bit too, and I'll explain that below the pics.


After putting the first box together I decided I wanted something extra instead of just the cut outs of the egg. So I added some glitter-here's how I did it. First, while the egg box was still on the mat (in Studio) I created an oval that was just a bit bigger than the egg portion of the box. I dragged the box off the mat and cut out the oval using some scrap cardstock for a template. Then I took some packing tape and stuck it to the shiny side of freezer paper just to have it on something solid while I cut it out. I used the template to draw the oval shape on the tape and cut it out with scissors. I removed the freezer paper backing and stuck the tape over the backside of the box so the sticky side faced front through the openings of the egg shape. I covered the sticky side with glitter (Art Institute and Doodlebug brand). Then I used the silhouette to cut the oval from paper that matched the color of the glitter and glued that to the back to make the colors pop more. In real life it looks much more sparkly-it's hard to catch that with a camera. I stole borrowed some Easter grass from my kids' baskets and we settled the eggs into their little nests. Then we were off to give them to Grandma and Grandpa (along with some decorated cookies). Paper is all from Stampin' Up.

Friday, April 15, 2011

My current project

I apologize for not posting much lately. I am working on this quilt and it's slow going-it's not like a card that I can turn out in one night (but there are people who can make a whole quilt in one day. I am not one of those people). It's for my friend Melissa and it will be (when it's done) a boxy stars quilt made with Moda Bliss fabric. I can't wait to see this come together some more-it's an amazing line and a great pattern.

So cheer me on because I have a hard time keeping up with my sewing.


Saturday, March 26, 2011

More Silhouette cards

Can you tell I'm having fun with my new toy?? I ordered some of the Silhouette sewable interfacing so I am hoping to have a fabric craft done soon. I am also working on a quilt for a friend and will probably start posting a few pics of my progress (so she doesn't wonder what is up with her quilt).

Last week I wanted to try making a card using Silhouette's Studio software to cut from, but using an SVG file. So I picked out a design from the Lettering Delights Spring-a-ling set. I opened it in Inkscape, did a path/object to path (this seems to make it work better), and then saved as a dxf file. Then I opened it in Studio and went from there to resize. Then I made a shaped card base by doing an offset on the flowers and added a rectangle to the bottom. I duplicated the shape, mirrored it, aligned the two sides, and welded them to make the base. Then I cut all the pieces out with the Silhouette. I used Paper Trey Ink cardstock for the card base, Stampin' Up patterned paper for the flowerpot, Lasting Impressions and Stampin' Up patterned paper for the flowers, Bazzill cardstock for the stems and Stampin' Up cardstock for the flower centers. The gray on the bottom is Bazzill cardstock I cut in a strip (with my paper trimmer). I am loving the shaped cards and they're so easy to make in Make-the-Cut or Studio software.


On this next card, I wanted to try out the Silhouette's print and cut feature. So I found a graphic I liked from the Lettering Delights Harajuku Girls set and used the Studio software to print it and then cut it out with the Silhouette. My first try was about a millimeter off. I don't know what I did wrong but the second try was a success! I used Make-the-Cut to cut out the letters from a font called Mouseyer (I don't think the Studio software has the ability to load a font that isn't installed) and I also used it to cut the pink oval. Card base and oval are Stampin' Up cardstock. The letters and background paper are KI Memories patterned paper and the design is printed on and cut from Neenah Classic Crest cardstock. When I showed this to my 13 year old daughter, she got that look in her eye. I think she's already decided to give this to her teacher or one of her friends.


Tuesday, March 22, 2011

You're a Hoot

Looks like I'm really into birds these days! The next card I post will not have a bird. I promise. This card was made from some graphics by Nancy Kubo which I separated and traced using Photoshop Elements and Make-the-Cut. I cut it out with my brand spankin' new Silhouette SD. Paper is all from Stampin' Up and Bazzill.


Thursday, March 17, 2011

You're Tweet

I decided to upgrade from my Cricut to a Silhouette SD. It arrived yesterday so I got it all set up to work with Make-the-Cut and today I made this little shaped card. I used tutorials from my friend Jin's website, underacherrytree.com, to make the shaped card base and used svg files from Lettering Delights to cut out the images. The bird is from the Twitter Park svg set and the letters are from the Sweet Nothings set. There isn't a "you're" in the set, so I combined images to make it and used an apostrophe from a regular font. The silhouette cut like a champ once I got the hang of it (I have a cold so it took me longer than normal. That's my excuse, anyway)! The card base is Paper Trey Ink 110# cardstock and the rest of the papers are from Stampin' Up. Everything cut easily with just one pass of the cutter (something I was concerned about but had no reason to be-while I was "learning" I cut clear through my mat somehow). Even the intricate parts, like the flowers on the wing, cut perfectly. I am very happy with the Silhouette so far!


Thursday, February 24, 2011

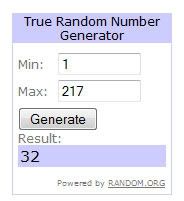
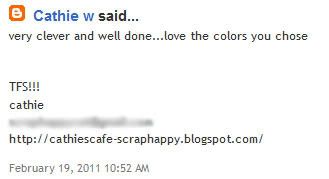
Blog Hop Winner!!

Thanks to everyone for hopping with me! The winner of the Lots of Pun stamp set is...

Cathie W!!


congratulations Cathie! I will email you to get your information so you can get your prize!

*please note that when I did the drawing there were 217 comments. The others were made after.

Monday, February 21, 2011

Thanks for hopping-there's still time!


I wanted to thank everyone for visiting and commenting during the Birthday Blog Hop so far. Today is the last day to leave a comment to enter the drawing! I did read each and every comment and wanted to clear up or comment on a couple of things:

I don't live in Canada. Sometimes I wouldn't mind it-because they are so much more allergy aware up there. So since I'm in the US, I buy my Canadian candy from Peanut Free Planet (link is in the sidebar in my favorite sites section). If anyone you know is allergic to nuts, tell them about this site. They have hundreds of items that are safe for nut allergic people.

Recoloring in Photoshop (or Photoshop elements) is pretty easy. I will try to post a quick how-to soon.

The best place to learn about using Lettering Delights and other companies' files in Make-the-Cut is at the Under a Cherry Tree blog. Jin does amazing work and has some great tutorials on her blog, including how to use a graphic (instead of an svg) and trace it to use in MTC.

I didn't make or decorate the bags. I saw them at Target and couldn't believe how perfectly they matched the colors I had chosen. So I decided to use them as props. But it would be a good idea, actually, to get plain bags and make a simple 3d cutout for them...

I think that's all so far. If you haven't signed up for the blog candy yet, just click here and leave a comment. thanks again!

Friday, February 18, 2011

It's a Birthday Blog Hop-with prizes!!


Welcome to the Joyslife.com Birthday Blog Hop where we are wishing Joy a very happy birthday!! This is my very first blog hop so I hope I don't mess up! You may have come here from Ann Marie's blog. If not, then you can do the whole hop by going to Joyslife.com and clicking through to each blog on the hop. In case you get sidetracked, here is a list of all the stops in this hop.


So here is my birthday blog project. I decided to do a birthday place marker and cupcake picks. I love the new Lettering Delights Frogs and Kisses graphic set and svg set. Even though it seems to be a Valentine themed set, I thought it would make a cute froggy birthday theme. I did want to change the colors of my frogs so I used Photoshop to do that.


I used Make-the-Cut and my Cricut to cut out the parts for the place marker. The frog was directly from the svg file but I used googly eyes instead of the cut out eyes. I think frogs look great with googly eyes! I used various MTC functions to make the place marker with the sticking up part (technical terms here). The balloons were made from a balloon graphic I found online and converted to a cut file. For the two-tone balloons I cut out two, used punches to punch the holes, and then layered them together. I used some wire I had on hand to attach them to the place marker.


For the cupcake picks (easy peasy) I just chose a graphic from the Frogs and Kisses set, changed the colors in Photoshop, and resized and printed it onto card stock. For the other side I used a stamp from the All Around Sentiments set from Joyslife.com. I punched my stamped images and my printed images with a circle punch, matted it onto a larger colored circle, and then layered those onto scalloped circles cut with nestabilities. I stuck them together with Stampin' Up Dimensionals with a toothpick in between to stick into the cupcake. The doily is cut from a file I found on this blog and modified.


The bags were from Target. I like to keep bags on hand because I hate wrapping gifts. Hate it. The cupcakes are topped with crushed Smarties. Smarties are the Canadian version of M&Ms. Since my daughter is allergic to nuts, we don't buy M&Ms but Smarties are just as tasty and perfectly safe. I collected the red ones (had to eat a lot of other colored ones to get these), crushed them a little, and sprinkled them on.

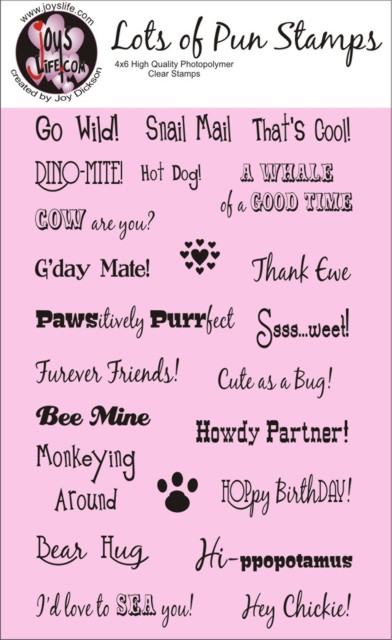
Now for the blog candy, courtesy of Joy! Up for grabs is one of her amazing stamp sets, Lots of Pun. This is such a cute set! If you have the Create a Critter cricut cartridge you NEED this set-it goes perfectly with so many of the critters.


Here is how to win this set:
1. leave a comment on this post
2. become a follower and leave another comment letting me know you did. If you are already a follower of my blog, leave a comment letting me know that instead.

Sign ups end at midnight eastern time on Feb 22nd. Please make sure there's a way for me to get ahold of you. If you don't have your email in your blogger profile, please leave it in the comment for me. If you are interested in buying this or any of Joy's other stamp sets, just go to Joyslife.com's products page. Joy is offering free shipping right now too!

And now on to the next blog in the hop. Just click here to go to Erika's blog to see the next cool birthday project! But first, be sure to grab Joy's cute new button!! To add this button to your blog, simply copy and paste this code:
Joy's Life.com


Wednesday, February 9, 2011

Kitty Cat Valentines

I made these for my daughter to give to her dance classmates for Valentine's day. I saw them on my friend Jin's blog and let me tell ya, she is a dedicated crafter. It was all I could do to make these without throwing it all out the window and Jin made dozens! Good thing Sammy only has 4 other girls in her class. So I made 6 (but there are only 5 in this pic) so she could keep one for herself and also give one to her teacher. The svg file is called Animal Valentines and is from Lettering Delights. All paper is Stampin' Up. The original file had cut out eyes but I decided I liked the googly eyes better. The texture plate that I used for the body is from Sizzix. You can't see the texture on the first picture but you can in the closeup.


Tuesday, January 25, 2011

Monster High Skullette Card

I don't know what a skullette is (a girl skull I guess?) but my daughter insists that's what this is. I found an image online and used my friend Jin's amazing tutorials here to make it into a cuttable file. I used my cricut and MTC to cut it out. My Monster High-loving daughter is thrilled with it! I feel like I passed some cool parent test or something.


Pink and black cardstock: stampin' up
white cardstock: Neenah
click here for the svg file
click here for the mtc cut file (size notes will not be accurate if you resize the file)

Saturday, January 22, 2011

Fabric Organization (warning-graphic!!)

I have this little metal cabinet thing (yard sale special) that I keep my yardage in. Over the years I've crammed a lot of fabric in it and have not done a bit of organizing. Until now. Warning-the before pictures are graphic. There's some overlap in the before pics too so I don't have quite as much fabric as it appears. That's my story, anyway.


I took out some of the fabric that I don't think I'll use along with 3 fat quarter sets that I decided on for projects. I put the project fabric in zipper bags with the pattern and hopefully will get to those soon. I also added some fabric that wasn't in the before pics that I got recently, thanks to my sister. The top shelf holds my completed tops plus layer cakes and a few fat quarter bundles. The middle shelves are all just yardage from various companies. On the right all my pre washed stuff and on the left, my unwashed. The bottom holds some yardage that was too long for the bolts, some yardage that goes with layer cakes or jelly rolls in my stash, plus some of my batting. Plus a few bolts of fabric that I couldn't decide whether to keep or not. So here are the after pics:


This blog shows the basic method I used but I didn't wrap the fabric all the way around the boards. I just folded it selvage to selvage, folded again from fold to selvages, and then wrapped like a regular bolt. I had no trouble putting up to 3 yards on a bolt but more than that would have been too much. The comic book boards are actually sturdier than I thought they'd be.

Next month I'll try to post my fat quarter storage. I have a little in this cabinet, mainly ones I bought in sets, but I have a LOT more than this. This cabinet also doesn't include any of my apparel fabric. I haven't sewn clothes in years but I might again someday.
Related Posts Plugin for WordPress, Blogger...