Welcome to the Joyslife.com Birthday Blog Hop where we are wishing Joy a very happy birthday!! This is my very first blog hop so I hope I don't mess up! You may have come here from
Ann Marie's blog. If not, then you can do the whole hop by going to
Joyslife.com and clicking through to each blog on the hop. In case you get sidetracked, here is a list of all the stops in this hop.
So here is my birthday blog project. I decided to do a birthday place marker and cupcake picks. I love the new Lettering Delights Frogs and Kisses graphic set and svg set. Even though it seems to be a Valentine themed set, I thought it would make a cute froggy birthday theme. I did want to change the colors of my frogs so I used Photoshop to do that.


I used Make-the-Cut and my Cricut to cut out the parts for the place marker. The frog was directly from the svg file but I used googly eyes instead of the cut out eyes. I think frogs look great with googly eyes! I used various MTC functions to make the place marker with the sticking up part (technical terms here). The balloons were made from a balloon graphic I found online and converted to a cut file. For the two-tone balloons I cut out two, used punches to punch the holes, and then layered them together. I used some wire I had on hand to attach them to the place marker.

For the cupcake picks (easy peasy) I just chose a graphic from the Frogs and Kisses set, changed the colors in Photoshop, and resized and printed it onto card stock. For the other side I used a stamp from the
All Around Sentiments set from Joyslife.com. I punched my stamped images and my printed images with a circle punch, matted it onto a larger colored circle, and then layered those onto scalloped circles cut with nestabilities. I stuck them together with Stampin' Up Dimensionals with a toothpick in between to stick into the cupcake. The doily is cut from a file I found on
this blog and modified.

The bags were from Target. I like to keep bags on hand because I hate wrapping gifts. Hate it. The cupcakes are topped with crushed Smarties. Smarties are the Canadian version of M&Ms. Since my daughter is allergic to nuts, we don't buy M&Ms but Smarties are just as tasty and perfectly safe. I collected the red ones (had to eat a lot of other colored ones to get these), crushed them a little, and sprinkled them on.
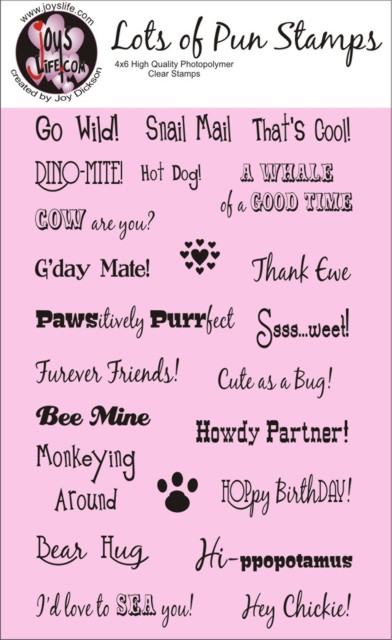
Now for the blog candy, courtesy of Joy! Up for grabs is one of her amazing stamp sets, Lots of Pun. This is such a cute set! If you have the Create a Critter cricut cartridge you NEED this set-it goes perfectly with so many of the critters.

Here is how to win this set:
1. leave a comment on this post
2. become a follower and leave another comment letting me know you did. If you are already a follower of my blog, leave a comment letting me know that instead.
Sign ups end at midnight eastern time on Feb 22nd. Please make sure there's a way for me to get ahold of you. If you don't have your email in your blogger profile, please leave it in the comment for me. If you are interested in buying this or any of Joy's other stamp sets, just go to
Joyslife.com's products page. Joy is offering free shipping right now too!
And now on to the next blog in the hop. Just
click here to go to Erika's blog to see the next cool birthday project! But first, be sure to grab Joy's cute new button!! To add this button to your blog, simply copy and paste this code:


